Tutorial - Creating an Event Registration Form with Mixo
Creating a registration form for your Mixo website is a great way to collect attendee information for events or manage sign-ups. Follow this step-by-step guide to set up a registration page easily.
Step 1: Access Your Mixo Website
Begin by logging in to your Mixo account and selecting the website where you want to create a registration form. If you haven’t already created a website, you can start by setting one up using our AI Website Builder.
Step 2: Open the Site Editor
Once logged in, navigate to your site dashboard and click on “Site Editor”. This is where you’ll add and customize your pages.
Step 3: Add a New Page for Registration
In the Site Editor, click the “New Page” button. Here, Mixo provides various templates you can select from. Choose “Registration Form” from the list.
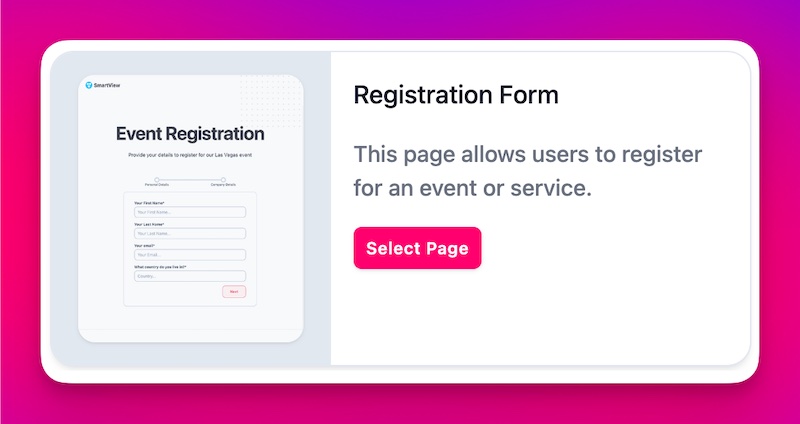
Step 4: Provide Event Details
You’ll be prompted to enter details about your event. Provide a descriptive sentence or two about your event. The AI will use this information to customize the registration fields and page content.
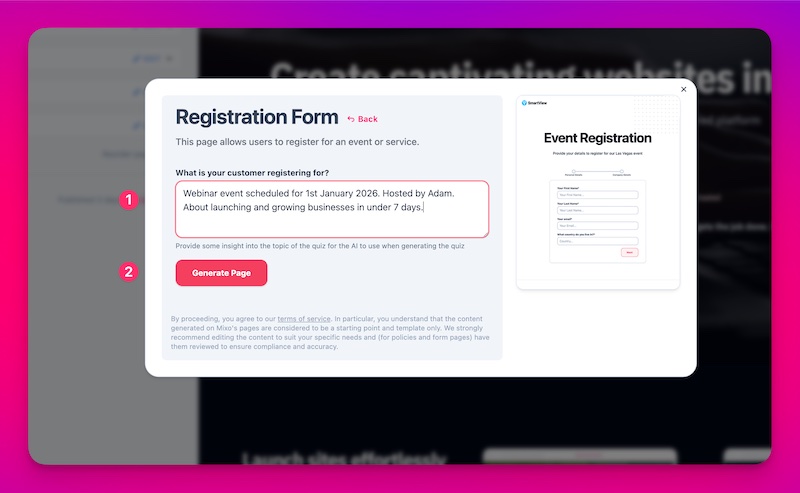
Step 5: Customize Your Registration Form
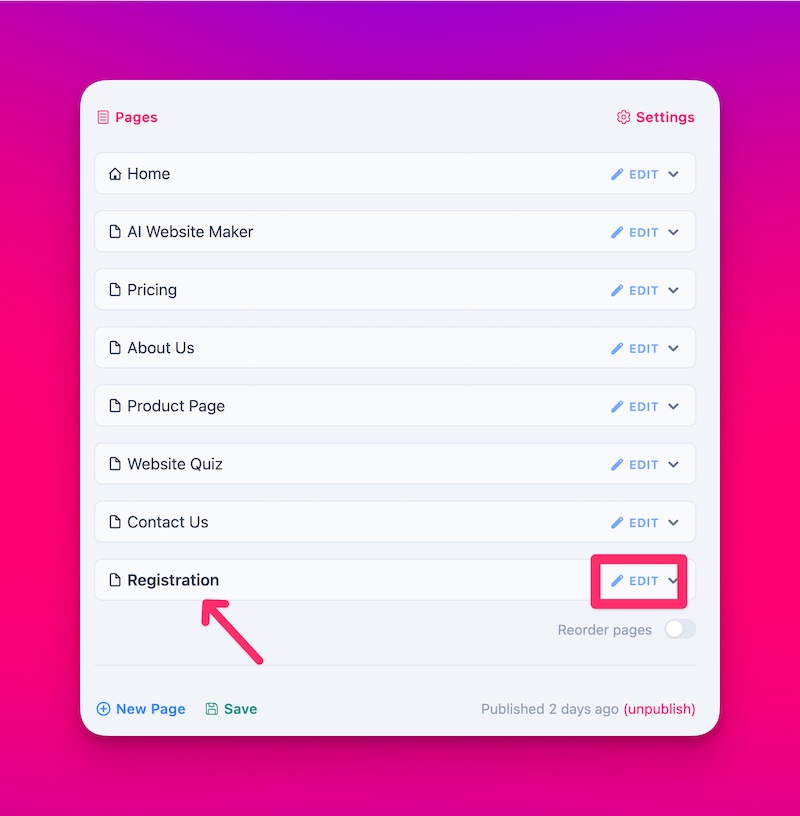
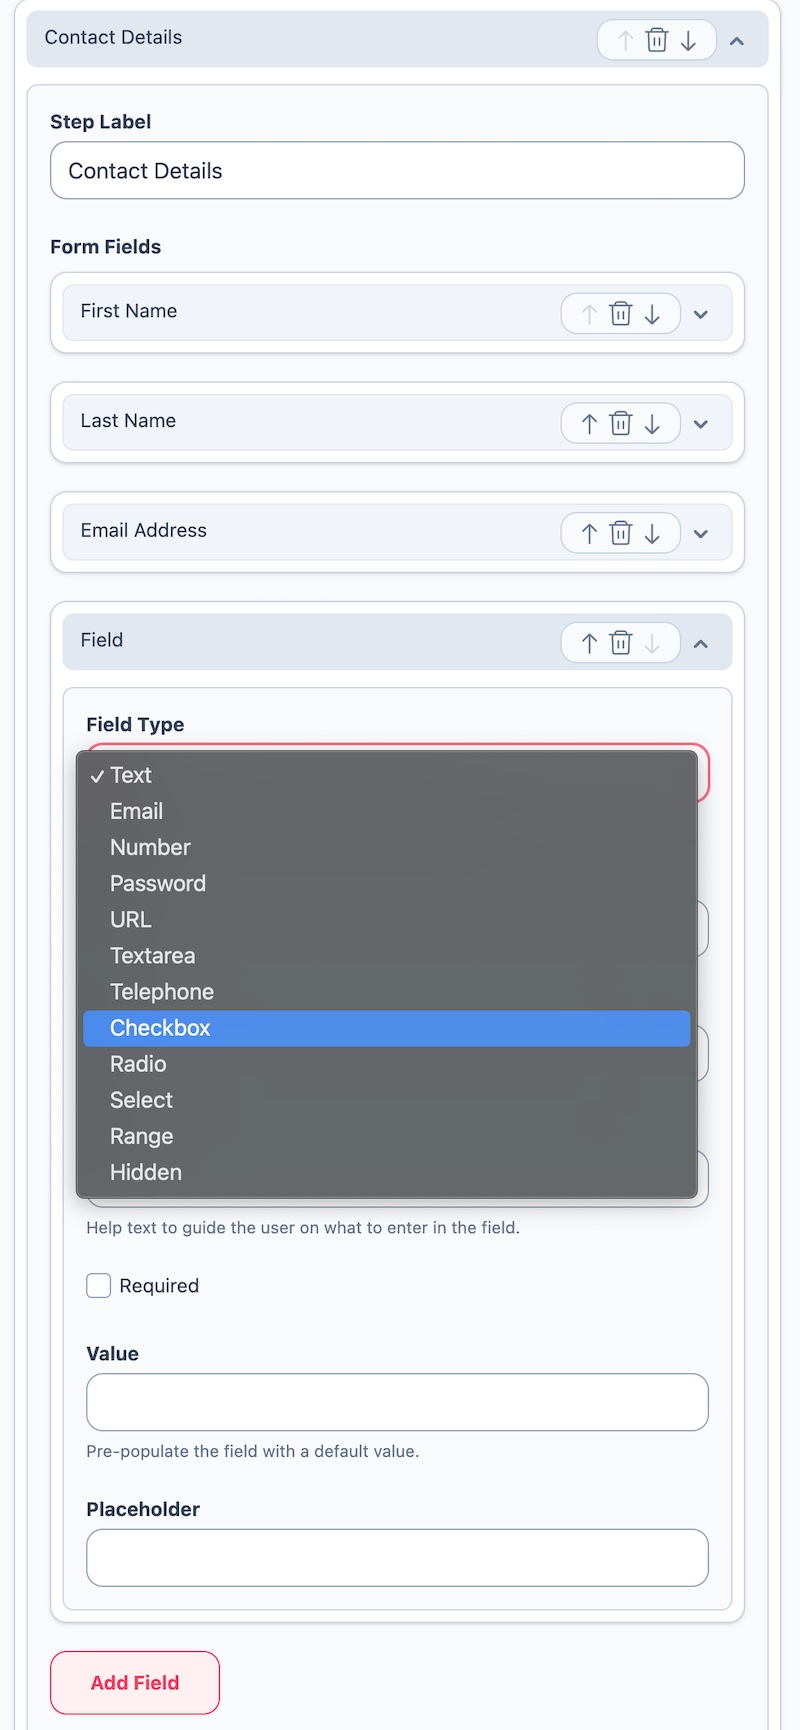
Once the registration page is added, click “Edit” next to the registration form page to access editing options. Under the “Form” section, you can customize fields, titles, and the layout to fit your needs.
Add or Remove Form Fields
- Click “Add Field” to include additional fields such as name, email, and more.
- You can remove or reorder fields by dragging them or clicking the delete icon.
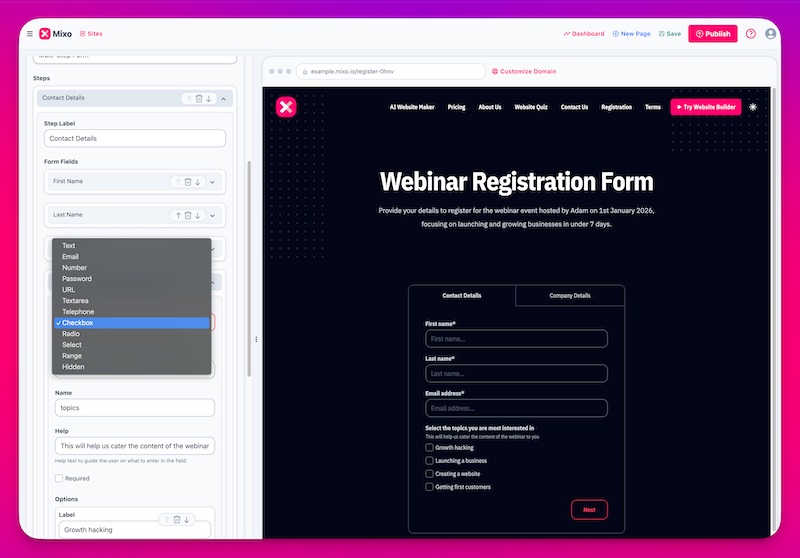
Change Field Types
For gathering specific data, select the appropriate field type:
- Use “Text” for names.
- “Email” ensures emails are valid.
- “Checkbox” or “Radio” are great for offering multiple choices.
Step 6: Configure Form Settings
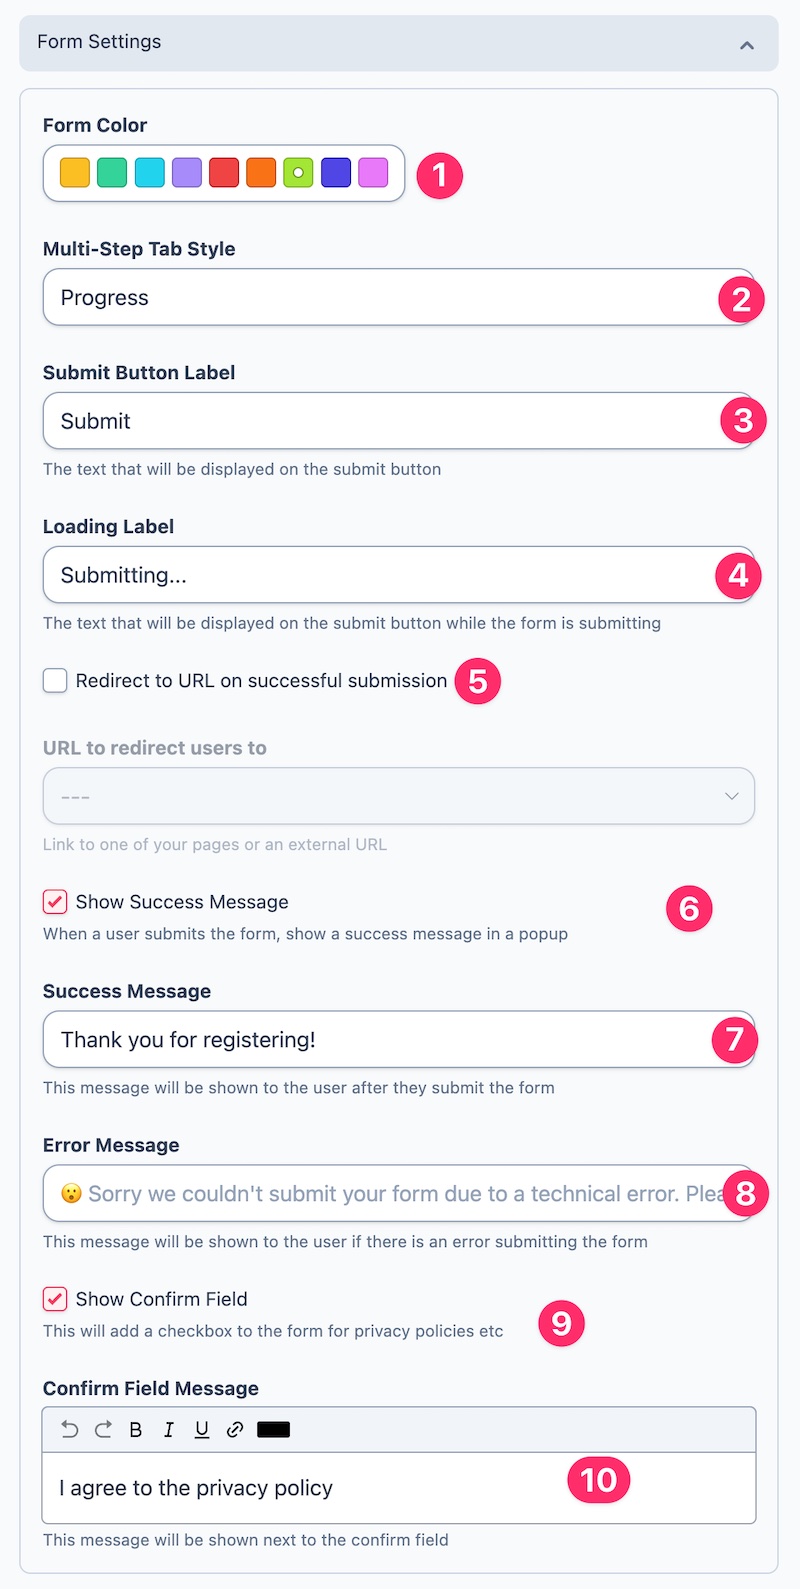
Scroll down to “Form Settings” within the editor. Adjust settings like Submit button label, form colors, and post-submission messages.
Customize Submission Response
- Set what happens after submission, such as displaying a success message or redirecting to another page.
- Ensure reliability and professionalism by crafting a clear and friendly success message for your participants.
Step 7: Preview and Publish
Before finalizing, preview the form to ensure it looks and functions as desired. When satisfied, hit “Publish” to make your online registration form live.
Conclusion
You’ve successfully created a customized online registration form for your event on your Mixo website! Check your dashboard regularly to view and manage attendee submissions. For further customization or support, feel free to reach out to Mixo’s support team.
Additional Resources
If you need more help or have specific form requirements, please contact the team at feedback.mixo.io.
“I tried three other AI Website builders, and Mixo always came out on top. The interface is easy to understand. The template is simple to use, and customer service is fast, precise, and clear.”
Trusted by over 750,000 of the most innovative creators in the world.
Mixo is the trusted, easy-to-use platform chosen by everyone from solo entrepreneurs to employees at Fortune 500 companies for its reliability, quality, and cutting-edge features.